Description
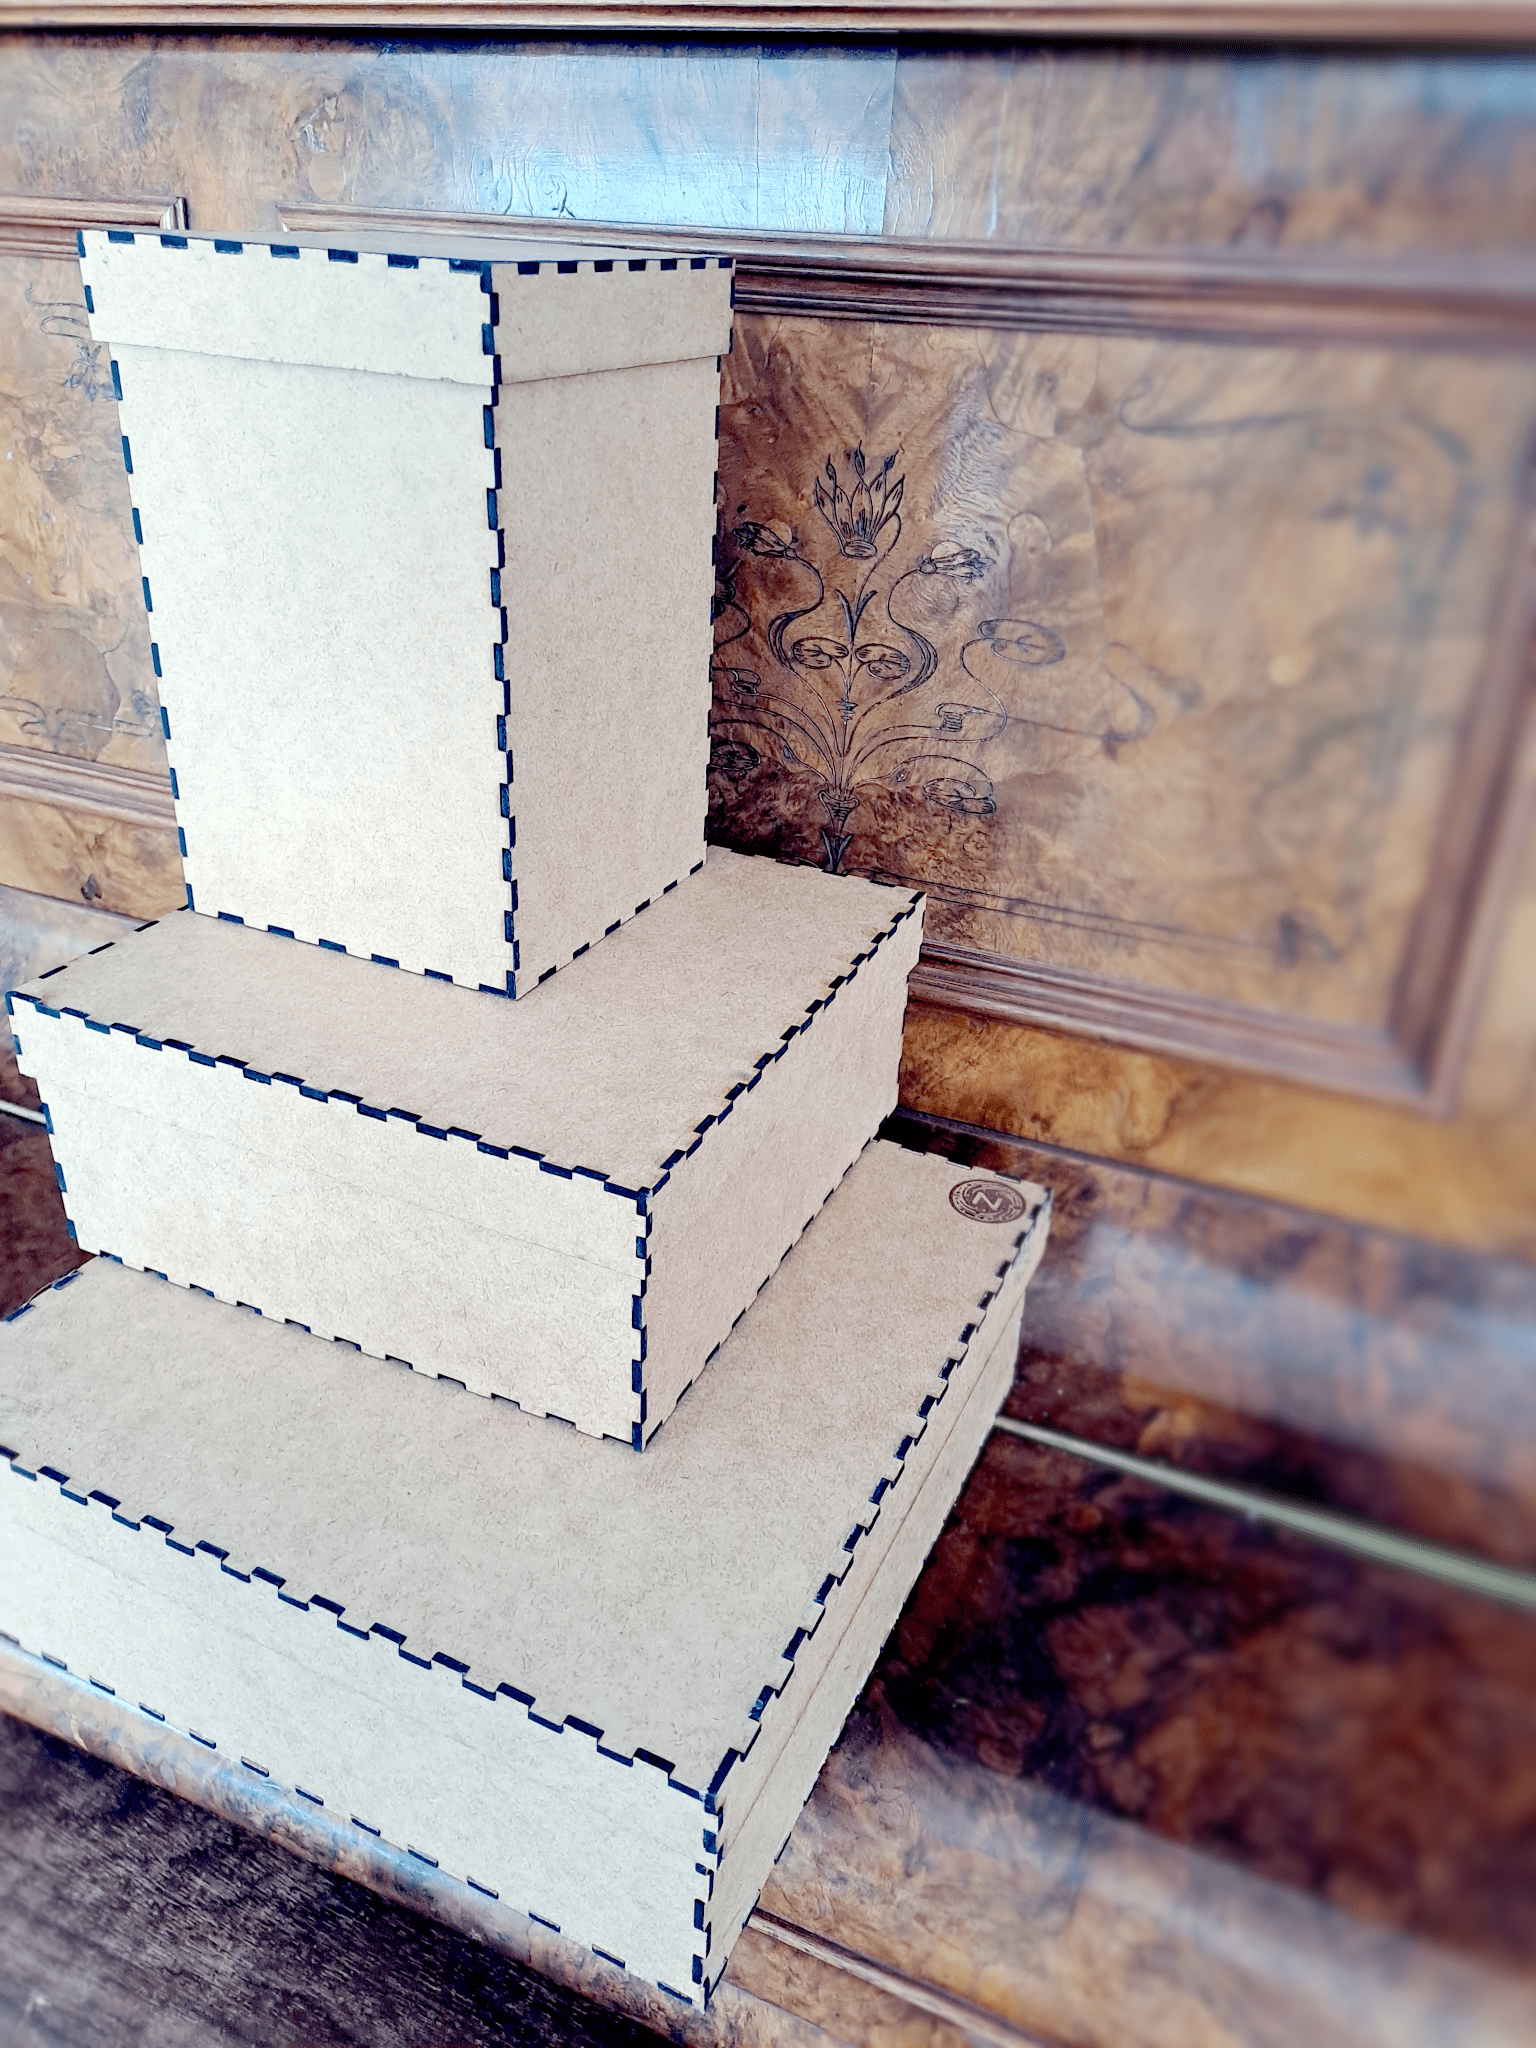
The Custom Paintable MDF Box lets you choose the exact dimensions you need for your project. Built from quality Supa Wood, this box arrives with a clean, smooth finish that is ready for painting, staining, decoupage, or any other decorative treatment you have in mind. Simply enter your preferred length, width, height, and lid overhang using the configurator on this page, and the price is calculated instantly based on the amount of material required.
Each box is laser cut from 3mm MDF Supa Wood, giving you precise edges and tight-fitting interlocking tabs that hold the pieces together without glue during assembly. The lid is designed to sit neatly over the box body with a slight clearance so it slides on and off smoothly. You control how far the lid comes down over the sides by setting the overhang measurement, with a minimum of 10mm and a maximum equal to the full height of the box. This means you can create anything from a shallow tray with a barely-there cover to a deep container with a lid that reaches all the way to the base.
The maximum size for any single dimension is 36cm, which gives you plenty of room for most storage, gifting, and craft applications. Whether you need a small jewellery keeper, a medium-sized keepsake box, or a larger container for art supplies and photographs, you can dial in the measurements to suit. Because every box is cut to order, there is no wasted stock and you get a product that fits your specific requirements rather than a one-size-fits-all solution.
Once your Custom Paintable MDF Box arrives, some assembly is required using wood glue. Apply wood glue along the interlocking tabs, slot the four side panels into the base, and allow the glue to set. Assemble the lid in the same way. A full step-by-step assembly guide is included with your order. After the glue has dried you can sand lightly if desired and then apply your chosen finish. Acrylic paint, spray paint, wood stain, and varnish all work well on the smooth MDF surface.
This product is a practical choice for crafters, teachers running workshop activities, event planners putting together personalised gift boxes, and small business owners who need branded packaging in a non-standard size. It also makes a thoughtful gift on its own when decorated and filled with treats or keepsakes. The natural wood tone pairs well with any colour palette, and the sturdy construction means the finished box can be used and enjoyed for years.
A Custom Paintable MDF Box from NellCo combines the flexibility of made-to-measure sizing with the creative freedom of a blank canvas. Choose your dimensions, place your order, and start planning your design.
Assembly Instructions
What You Will Need
- Your Custom Paintable MDF Box kit (all laser-cut pieces)
- Wood glue (PVA or any quality wood adhesive)
- A clean, flat work surface
- A damp cloth for wiping excess glue
- Optional: masking tape to hold pieces while drying
Identify Your Pieces
Your kit contains the following laser-cut MDF pieces. Lay them all out on your work surface before starting.
- 1 x Bottom panel - has outward-facing tabs on all four edges
- 2 x Front and Back panels - full-length pieces with tabs along the bottom and corner edges
- 2 x Side panels (Left and Right) - slightly narrower, with inward tabs on the bottom edge
- 1 x Lid top panel - slightly larger than the bottom, with outward-facing tabs
- 2 x Lid front and back panels - full-length lid sides
- 2 x Lid side panels - narrower lid sides
Step 1: Assemble the Box Body
- Take the bottom panel and place it flat on your work surface with the tabs pointing upward.
- Apply a thin line of wood glue along the tabs on one long edge of the bottom panel.
- Take one of the front/back panels and slot its bottom tabs into the matching slots on the bottom panel. Press firmly so the joint is snug.
- Repeat for the opposite front/back panel on the other long edge.
- Apply wood glue to the tabs on the two remaining short edges of the bottom panel and along the corner tab slots.
- Slot the two side panels into place. The side panels fit between the front and back panels at the corners, and their bottom tabs interlock with the bottom panel.
- Press all joints firmly together. Use masking tape around the outside to hold the walls in place while the glue sets if needed.
- Wipe away any excess glue with a damp cloth before it dries.
Step 2: Assemble the Lid
The lid is assembled in exactly the same way as the box body. The lid pieces are slightly larger so the finished lid slides over the top of the box.
- Place the lid top panel flat with tabs pointing upward.
- Apply wood glue to the tabs on one long edge and slot in a lid front/back panel.
- Repeat for the opposite lid front/back panel.
- Glue and slot in the two lid side panels, fitting them between the front and back pieces at the corners.
- Press all joints firmly and tape if needed. Wipe excess glue.
Step 3: Allow the Glue to Dry
- Leave both the box body and lid on a flat surface for at least 2 hours to allow the wood glue to set.
- For a full-strength bond, leave overnight before handling or decorating.
- Remove any masking tape once the glue has fully dried.
Step 4: Test the Fit
- Once both pieces are dry, gently place the lid over the box body.
- The lid should slide on and off smoothly with a small amount of clearance on each side.
- If the fit is slightly tight, lightly sand the inside edges of the lid sides with fine sandpaper (220 grit).
Step 5: Finishing and Decorating
Your assembled box is now ready to paint or decorate. Here are some tips:
- Lightly sand all surfaces with 220-grit sandpaper for an extra-smooth finish before painting.
- Apply a coat of wood primer or PVA sealer before painting for the best colour coverage.
- Acrylic paint, spray paint, chalk paint, wood stain, and varnish all work well on MDF.
- For decoupage, apply a thin layer of PVA glue, lay your paper or fabric, and seal with another coat.
- Allow each coat to dry fully before applying the next.
Tips for Best Results
- Use a quality PVA wood glue for the strongest bond on MDF.
- Do not use too much glue as it can squeeze out and leave marks on the surface.
- Work on a protected surface as wood glue can be difficult to remove from furniture.
- If a tab feels loose, apply a small amount of extra glue and hold in place with tape until dry.
- Store your finished box in a dry area. MDF can swell if exposed to moisture for extended periods.
View full assembly guide
Only logged in customers who have purchased this product may leave a review.


Reviews
There are no reviews yet.